The columns in your index are “document fields” in Disclosure Ready.
Document fields allows users to provide greater detail to certain matters, which can then be customised to meet their firm’s specific requirements.
In this article you are going to learn how to create new fields, add fields to your folder(s), and update the field contents.
1. Create new fields #
To create new fields, follow these steps:
- Go to your matter
- Select “Setup” from the top banner
- Select “Fields” on the left hand side
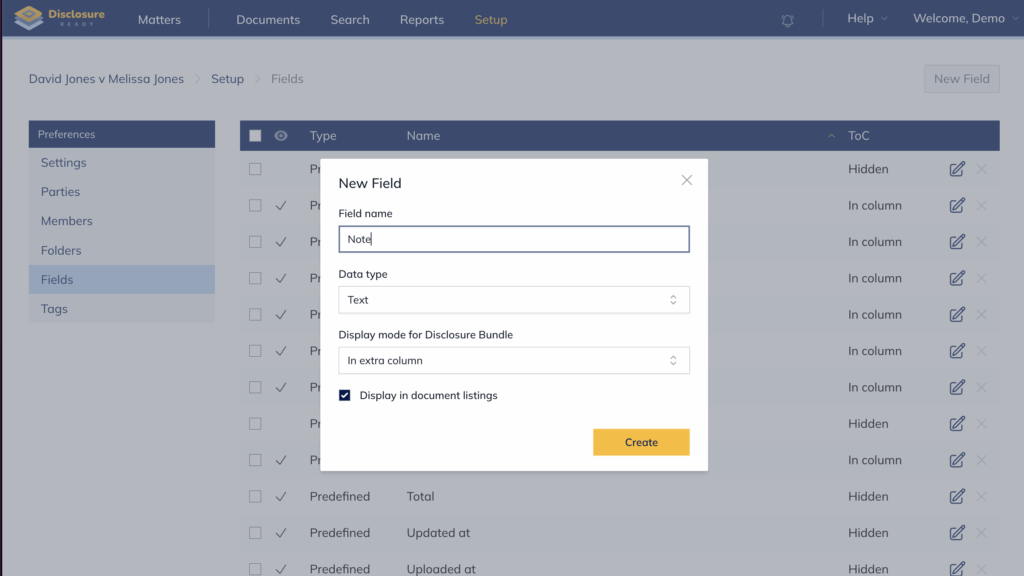
- Click on “New Field” on the top right corner

- Add the following details for your new field:
- Field name
- Field type, which can be:
- Text: Single line of text (e.g. Note, Comment, Sender, etc.)
- Boolean: True or False (e.g. Reviewed, Approved, etc.)
- Integer number: Whole number (e.g. Internal #, etc.)
- Decimal number: Number with decimal, like monetary amounts (e.g. Purchase Price, Account Balance, etc.)
- Date-only: Date format (e.g. Served date, Sent date, etc.)
- Optionally:
- Display mode: Select whether you wished to display in column or row, usually you would want the information displayed by column so leave the default option
- Display in document listings: Enable this to have the field displaying in the columns, if you uncheck this box, the information will only be displayed in the detailed view of the document and will not display in the folder list nor the index
2. Adding fields to the folders #
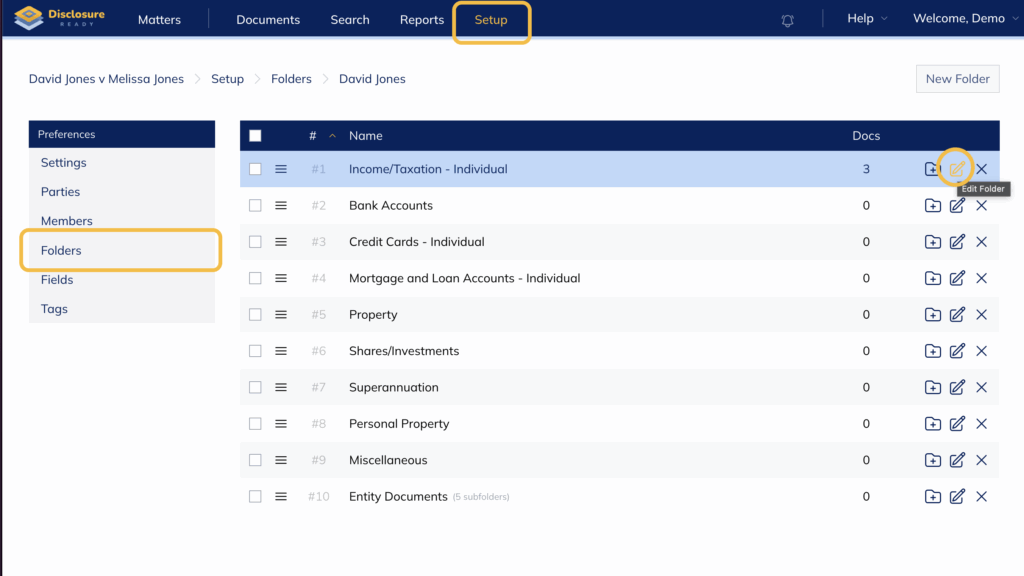
To display a new column in the index and folders, fields have to be added to the folders. To do so follow these steps:
- Go to your matter
- Select “Setup” from the top banner
- Select “Folders” on the left hand side
- Click on “the pencil icon” on the right hand side of the folder name
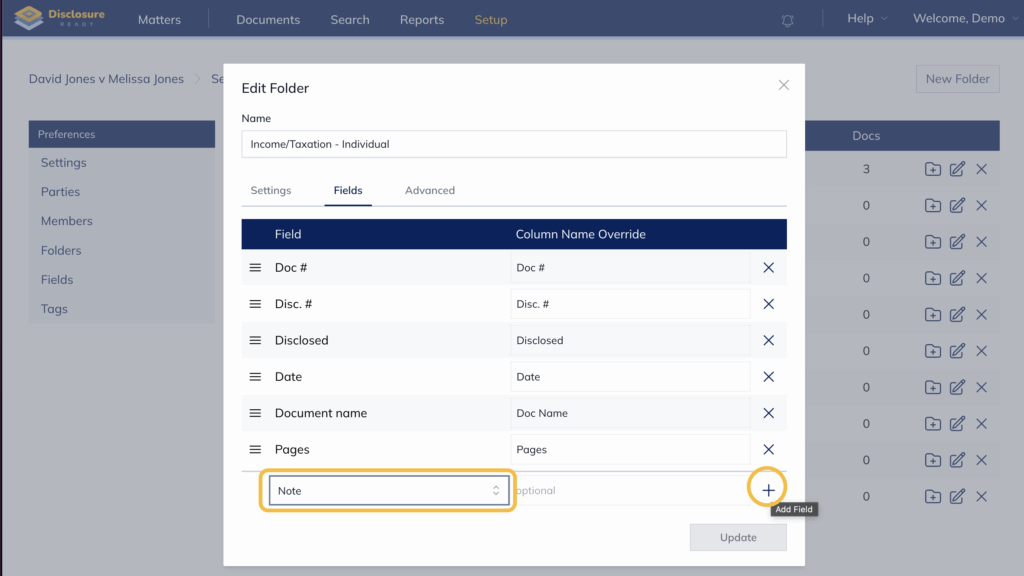
- Select the new field from the dropdown list and click on the “+” icon to add the field
Optionally, you can drag and drop to the preferred order by clicking and holding the three bars on the left hand side of the field name:
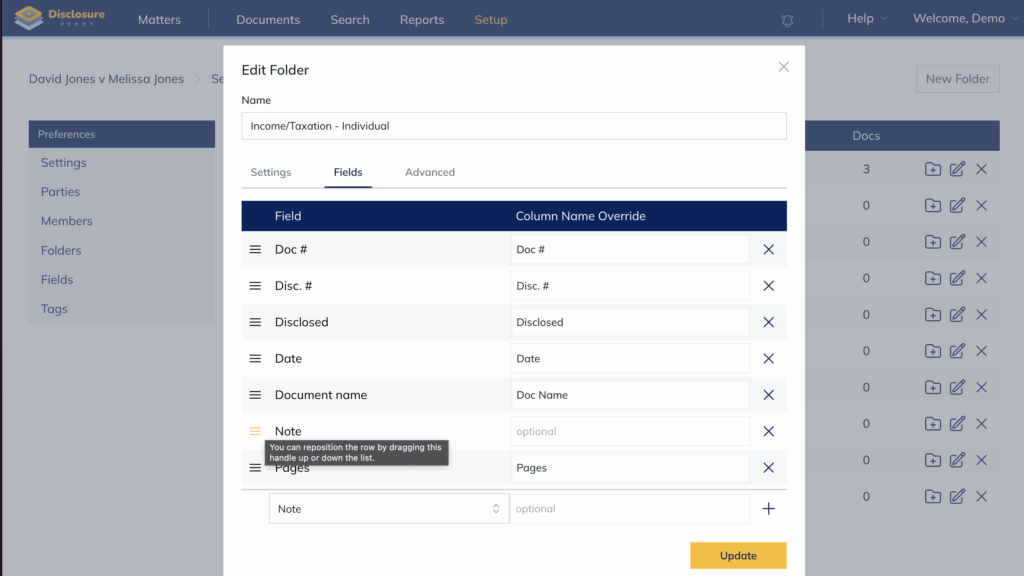
6. Once you have added the field, click on “Update” to save your changes.
3. Updating document fields #
Once the fields have been enabled, follow these steps to update their contents:
- Go to your matter
- Select the folder with the documents that you want to update on the left hand side
- Click on “the pencil icon” on the right hand side of the document name
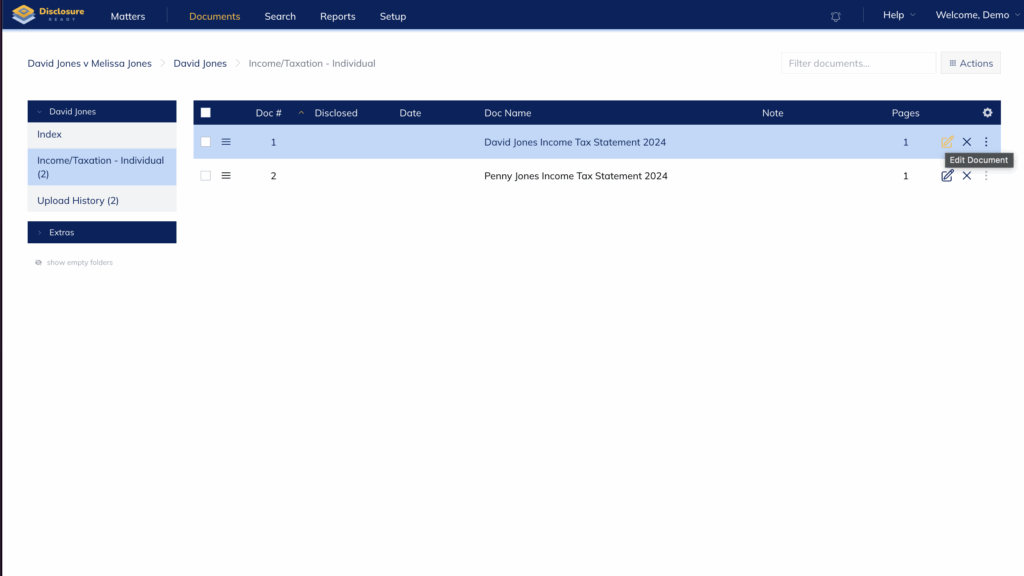
- Update the value of your new field and click “Update”

- The new field details will now appear in the document list at the folder level:
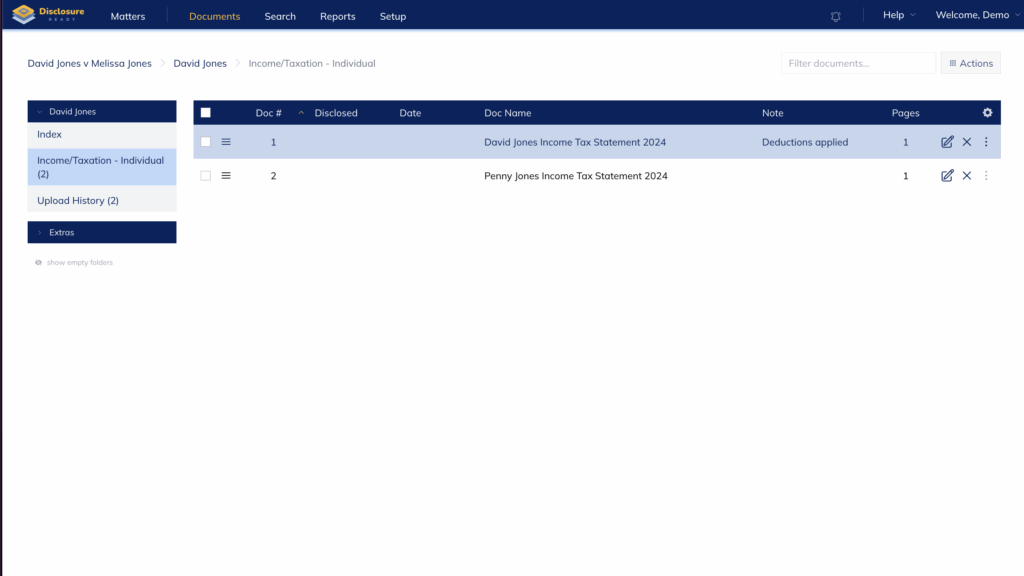
And will also display at the index level:
Note: If you do not see the new field’s details as a new column, make sure to have enabled the option “Display in document listings” in the fields settings.
Note: Document fields will be included when creating matter templates.